Translate
June 25, 2022
6/25/2022 03:47:00 PM
Tube: ©Alex Prihodko Get it at: VMA
Download - Cluster Frame (#23) Blue Shores FTU Scrap Kit Christmas at the Beach freebie Mehdi Plugins
- Resizing of images will be done with 'bicubic' setting.
Open Cluster Frame, resize 80% copy/paste into new blank canvas 800x800px
Open Blue Shores Element 3. Resize 30% paste into image, move to lower right of the smaller frame on the right side.
Open Paper 6 - paste as new layer into your design. In your layers palette, drag it to the bottom.
Move around until you have a nice setting in your frames. Erase all the extra that is not the background
in the frames.
Open element 31. resize 65% paste as new layer into the larger frame. Should be just above the scenery layer.
Open the christmas at the beach kit - numbers 56 and 54 resize 54 to 30% place at bottom of frames and flowers on the right
resize 54 to 20% place on left with the curve of the shell just on top of the blue flower.
open image 80, resize 25% paste into your image, just behind the clam shell on the right.
Open image 9 - resize 15% paste on top of the clam shell layer, just to the left. free rotate to the right 15 degrees.
Adjust >> Sharpness >> Sharpen
Back to the Mizteeques Blue Shores Kit now --
Open element 1 - beautiful flower!! resize 30% / Adjust >> sharpness >> sharpen
paste on to the upper left corner of large frame.
Effects >> 3Deffects >> drop shadow: 3,3,50,6
Effects >> 3Deffects >> drop shadow: -3, -3, 50, 6
Open element 6, resize 30%, paste onto the upper right corner of large frame, just above the other flowers.
Open element 17, resize 12% place on top left of small frame
Open element 11, resize 10%, place in sky in larger frame.
Paste in your main tube - mermaid or whatever you are using.
I am using :copyright:Alex Prihodko mermaid purchased at VeryMany Artists just $1.85!!!
Then on your layers palette, drag your tube layer below the frames, but on top of the beach background.
I have mine peeking from behind the seaweed. Resize your tube to whatever you need to, to look nice.
Erase the extra parts again.
Effects >> 3D effects >> drop shadow : same settings -3, -3, 10, 6
Still on that layer, change the Blend Mode to Luminance (Legacy)
Lower the opacity to 53%
Paste your main tube again as new layer. Move it to the very top layer on the layer palette or
layers >> arrange >> bring to top
Depending on the size of your tube and what it is - resize.
I resized mine 45%. To make room for my tube; I hide that layer. Merge all visible for the rest of the items.
Image >> resize canvas >> 1000 x 1000 px -- so I have room to move things around...
Effects >> 3D effects >> drop shadow: -6, -9, 57, 6
layers merge visible
Lets go back to our Christmas at the Beach 1 more time 

Open item 12. Paste as new layer. These bubbles are so pretty. I resized 40% and left them directly on my mermaid.
This is totally optional. duplicate bubble layer, resize 60% move to the small frame and arrange above the bottle.
Layers >>> merge visible
If you want your finished image smaller than it is. This is the time to do that. -- Before we create the back drop and put on the credits and our license number.
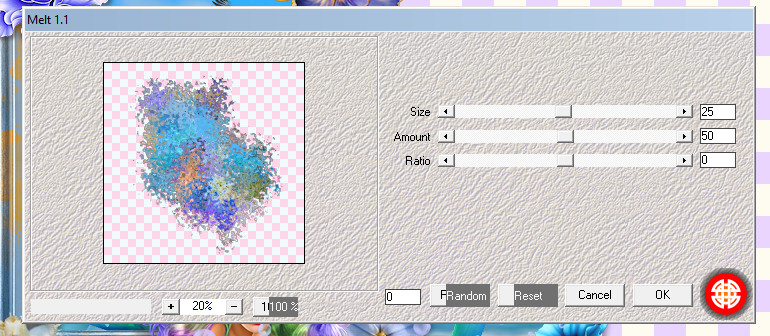
Duplicate your layer. Hide top layer. click bottom layer on layer palette so your working with only that layer.
Effects >> Medhi >> Melt
Unhide top layer. Merge / Visible.
Add credits.
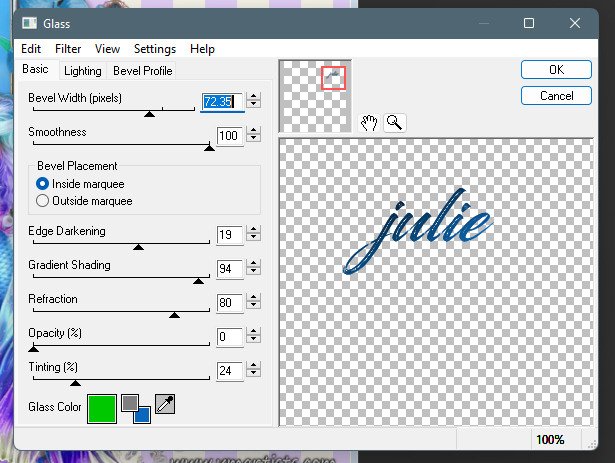
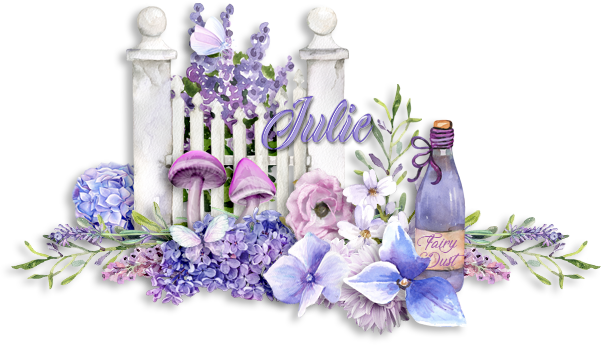
Add name. I didn't list Eye Candy in the filters. I just decided to use it on my name at the last minute...
And DOnE!
Tutorial by Julie S. Jenks June 17, 2022
Subscribe to:
Post Comments
(Atom)
Labels
*Freebie*
#ATG
#autumn
#christmas
#Contest
#CTwork
#DrawYourDreams
#faeriecharmdesigns
#forumchallenges
#fun
#MVD
#PGD
#RenderArtWorld
#SecretGardenDesigns
#TSC
#winter
#YKS
©Alex Prihodko
©Amber
©BellaCaribena
©Goldwasser
©Grianna
©IsmaelRac #SavageDezines
©Sheokate
©Steampunk
©VeryMany Tubes
©VeryManyArtists
©VMartists
3tzsdesigns
AdriennesDesigns
Adrun
AdRunner
Advent Calendar
AI
AMD
Aprilthescrapaholic
ATG
ATS
Autumn
AWS
Background Tile
BCA
beautiful
BJD
BMS
CAK
Chit-Chat
Christmas
Christmas in July
CnC
Coffee
Commission
Creative Misfits
CT
CTshowcase
CU
Cute-n-CharmingForum
Daily Stuff
dark
DeedlesnDoodles
DeniseC Art
DesignsbyKetura
DesignzByAnorie
diet
Digicats
DreamingWithBella
EFR
EleganceFly
FaerieCharmDesigns
Fall
family
fonts
forum exclusives
forumlife
freebies
friends
fun
gothic
gothique
Halloween
health
heart surgery
Hello
Hold My Heart
humans!
In Store
Intro
life
LindseyStirling
LusciousLadee
LynxTheMinx
Magical Moments
MagicalMoments
mental health
Mermaid
Millies PSP Madness
Mizteeques
MMF
mom
MoonVixenDesigns
MVD
my journey
new theme
news
October
Photoshop
Pixels
Prozac
PU
rant
RAOK
Re-Post
review
S&CO
sadness sickness
Savage Dezines
Scrapkits
SD
SecretGardenDesigns
Shares
siggie showcase
Siggies
Sigtags
Siren
snags
SneakPeek
steampunk
store-reviews
sugar
Suicide
summer
TagShowcase
ThePaperShelter
Tiny Turtle Designs
TKdezigns
tut-results
Tutorials
Tutorials by Pammers
updates
valentine bash
violin
WickedDiablaDesigns
winter
witch
work
Yule


0 comments:
Post a Comment
Leave me some luv and glitter! xoxo